


ADJUSTING THE END-PIN HEIGHT
We all are of different heights, and the length of our legs, torsos, and arms varies from person to person. Regardless of personal dimensions, the method for determining the correct length to extend the end-pin is the same for everyone.
Remember — that the original concept behind the invention of the end-pin was to raise the instrument off the ground in order to make it more comfortable to play. Adjusting the end-pin height to your own “perfect spot” requires some trial and error. Determining the most natural end-pin extension is a personal discovery that all students must make for themselves.
Some end-pins have notches every few inches along the metal rod, so you can lock the rod in place at a specific spot that fits your height requirements. Other end-pins are a solid, simple rod, and you can turn the screw to tighten the rod in place anywhere along the length of the end-pin.
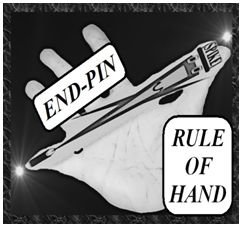
End-Pin Rule of Hand
Begin while seated with the cello resting across your knees.
Loosen the end-pin thumb-screw, but only a tiny bit.
Make the screw loose enough to allow the end-pin rod to slide freely. Now, please extend either hand.
For almost everyone, the approximate distance from the tip of the thumb to the tip of the pinky is close to the needed end-pin length. Therefore, extend the end-pin so as to match the width of your fully extended hand.
The end-pin length you need is almost equal to the measurement of the full extension of your hand. Now, slowly tighten the thumb screw in order to lock the end-pin in place.
Setting the end-pin to this approximate end-pin length is a great starting point. Further end-pin adjustment may be needed as you learn about – the Cello and You!

